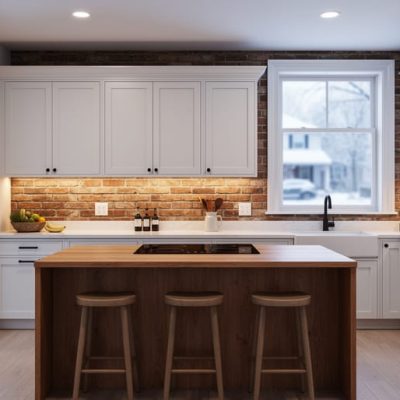
8 Kitchen Organization Ideas for Small Kitchens That Make Every Inch Work
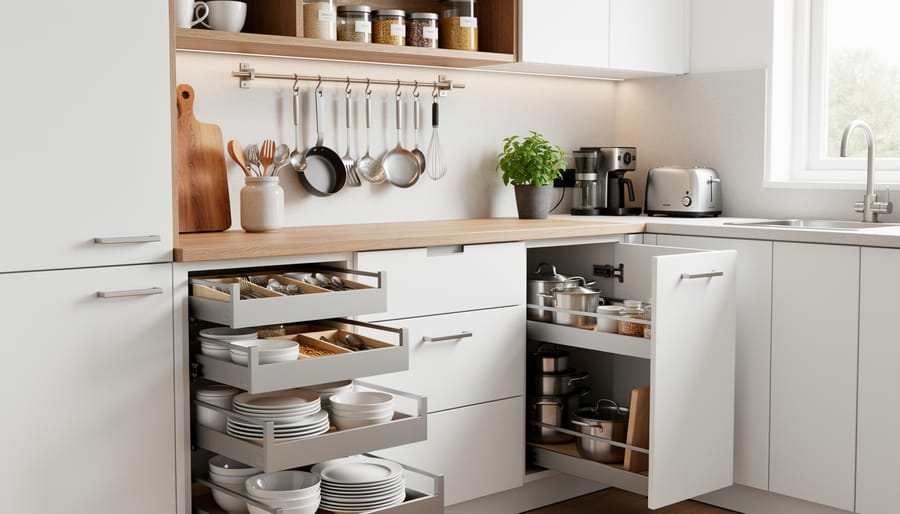
The fastest way to organize a small kitchen is to stop spreading storage across the room and start stacking it: build upward, pull everything out to meet you, and give every square inch a job. Eight strategies do most of the work. Full-height cabinetry and open shelving claim dead wall space. Pull-out pantries and deep drawers replace the dark back corners of fixed shelves. Rail systems keep daily tools off the counter, and carousel or blind-corner hardware turns awkward joints into usable volume. Foldaway surfaces let one worktop serve several tasks, while toe-kicks, cabinet doors, and the gap above the fridge recover storage you’ve been walking past. Finally, zoning by task and keeping containers, light, and sightlines consistent make a compact room read as calm rather than cramped.
These ideas were chosen because they hold up in real constraints: rentals, galley plans, apartments with no pantry. Designers from Tokyo to Copenhagen have long treated limited square footage as a prompt for precision, and the best solutions here favor durable, repairable hardware and fewer, better-chosen objects over disposable add-ons, which is its own quiet form of sustainability. Each of the eight ideas below stands alone, so pick one and start there.
How These Eight Ideas Were Chosen for Compact Kitchens
Choosing eight ideas from the countless options out there meant setting clear rules first. This list is curated, not the result of hands-on product testing. Each idea earned its place by meeting five criteria:
- Space gained: how much usable storage it adds per square foot of floor or wall.
- Ease of installation: whether it works within a renovation budget or a rental lease.
- Material sustainability: durable, repairable and responsibly sourced over disposable.
- Ergonomic access: items within comfortable reach, in line with how you actually cook.
- Aesthetic cohesion: storage that reads as calm and intentional, not cluttered.
The thinking behind these filters isn’t new. Architects and interior designers have refined it for decades in places where square footage is precious. Japanese minimalist storage taught us to hide the everyday and honor negative space. Scandinavian built-ins showed how cabinetry can disappear into the architecture itself. Italian modular systems proved that a compact kitchen can be flexible, reconfigurable and beautifully resolved.
Every idea below carries at least a few of these influences, and none demands a full gut renovation. Some suit homeowners ready to commission joinery, while others work for renters who can’t touch the walls. Start with whichever fits your constraints, then layer in the rest over time. A small kitchen rewards patience and precision far more than a single dramatic overhaul.
1. Go Vertical with Full-Height Cabinetry and Open Shelving
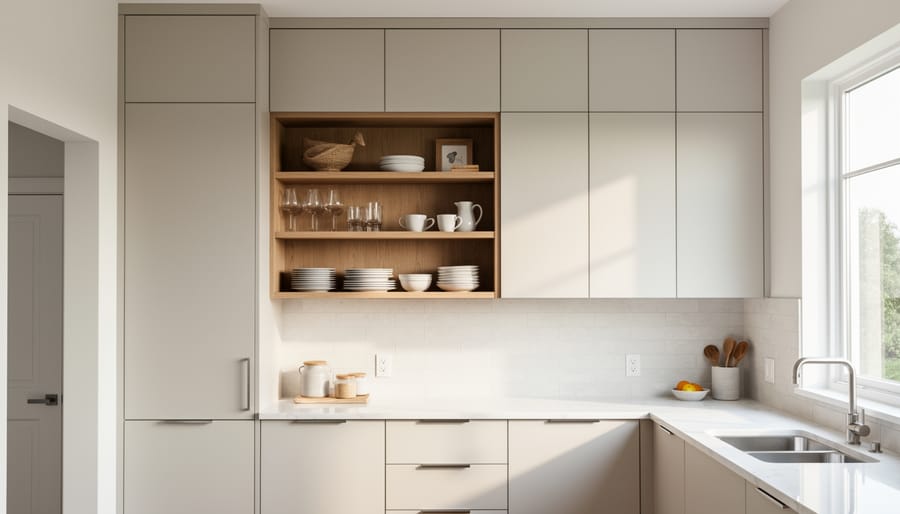
Most small kitchens run out of floor and counter long before they run out of wall. The first untapped resource is height, and the cabinet that stops 40 cm below the ceiling is wasted volume collecting dust. Running cabinetry to the ceiling adds roughly a third more storage without enlarging the footprint by a single centimetre.
Give that upper zone to the things you rarely touch: the roasting tin, the fondue set, the holiday platters. Keep daily items between knee and shoulder height, where a short reach does the work. A compact step stool tucked beside the fridge makes the top tier practical rather than aspirational.
The risk of going vertical is visual heaviness, a wall of doors pressing down on a narrow room. Balance it by mixing closed cabinets with open shelving. Closed units hide the clutter, while two or three open shelves at eye level give the eye somewhere to rest and display the handsome pieces worth seeing. Keep open shelves to a restrained palette so they read as composed rather than crowded.
Material matters as much as layout. Solid timber from certified sources or FSC-certified plywood gives shelving that carries real weight, can be refinished rather than replaced, and avoids the short life of cheap laminate boards.
The logic is hardly new. Library stacks and the storage rooms of the world’s architectural museums have long used full-height shelving to hold enormous collections in modest rooms. The same principle of vertical design applies to a galley kitchen: when the plan is tight, build upward.
2. Install Pull-Out Pantry Systems and Deep-Drawer Storage
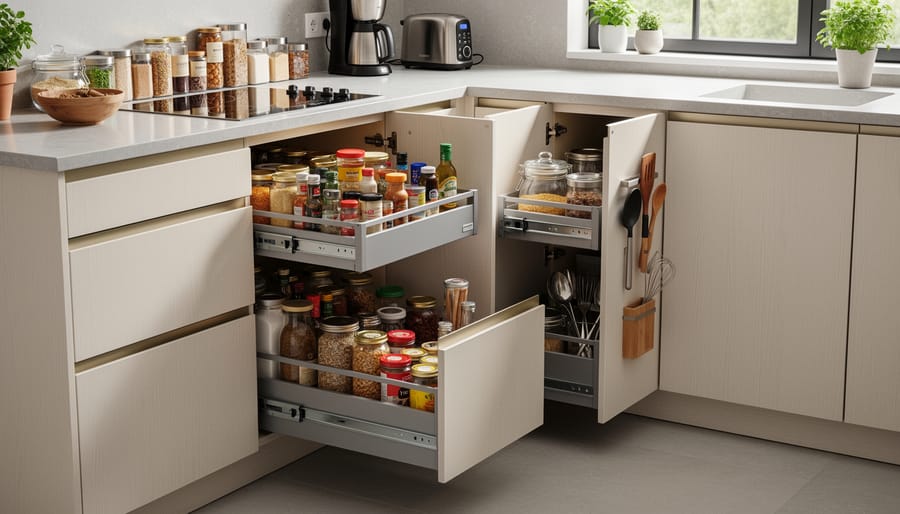
A fixed shelf inside a base cabinet hides everything behind whatever sits in front. You kneel, reach, shift three pots, and still lose the colander at the back. Drawers reverse that logic. When you pull a deep drawer fully open, the entire contents sit in view from above, so nothing gets buried and nothing gets bought twice. That visibility matters most in a compact plan, where every forgotten item is a wasted cubic centimetre.
Reach ergonomics point the same way. A loaded drawer brings the cupboard to your hands, so you lift less, bend less, and rarely crouch. Placed in the primary work zone, a few deep drawers can hold pots, mixing bowls, and bulk dry goods at a comfortable working height.
The cleverest gains come from awkward gaps. Many small kitchens leave a strip of 15 to 20 cm beside the refrigerator or cooker that conventional cabinetry cannot use. A narrow pull-out pantry fills that void, storing oils, tins, spices, and baking supplies on slim, full-extension runners. Treat it as architectural infill: a leftover sliver becomes a volume with a job.
Hardware choice shapes how long the system lasts. Look for full-extension runners with a stated load rating, and soft-close mechanisms from manufacturers that sell replacement dampers and runners. A repairable drawer can serve for decades, while a sealed, disposable one ends up in landfill within a few years. Pairing sturdy hardware with FSC-certified plywood boxes keeps the whole system durable and low-impact.
3. Use Rail Systems and Wall-Mounted Storage to Free the Counters
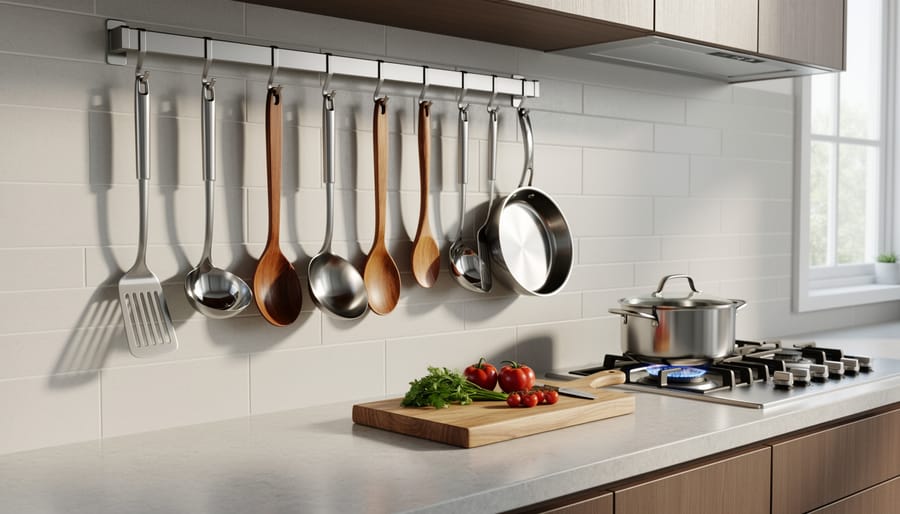
The fastest way to free a counter is to stop treating it as storage. Mount a stainless steel rail along the backsplash and let ladles, whisks, and spatulas hang within a forearm’s reach of the stove. Magnetic strips handle knives and metal tools, while a pegboard-style panel in solid oak or birch ply lets you rearrange hooks and shelves as habits change. Scandinavian and Japanese workshops have long worked this way: every tool has a visible home, and the wall becomes the organizing system.
Placement matters as much as hardware. Keep the tools you grab daily inside the primary work zone, roughly between the cooktop, sink, and main prep surface. Reserve outlying rail sections for occasional items, and leave breathing room between pieces so the wall reads as composed rather than crowded. The same logic underpins any Frank Lloyd Wright design where function and visual order are never separate concerns.
For materials, favor longevity. Brushed stainless steel resists moisture and heat, solid wood ages with a warm patina, and recycled metals such as reclaimed brass or aluminum bring a lower environmental footprint than disposable plastic organizers. Choose tools worth displaying, with matching handles and honest finishes, and the exposed wall stops looking like storage at all. It becomes a quiet, working feature of the room.
4. Make Corners Count with Carousel and Blind-Corner Solutions
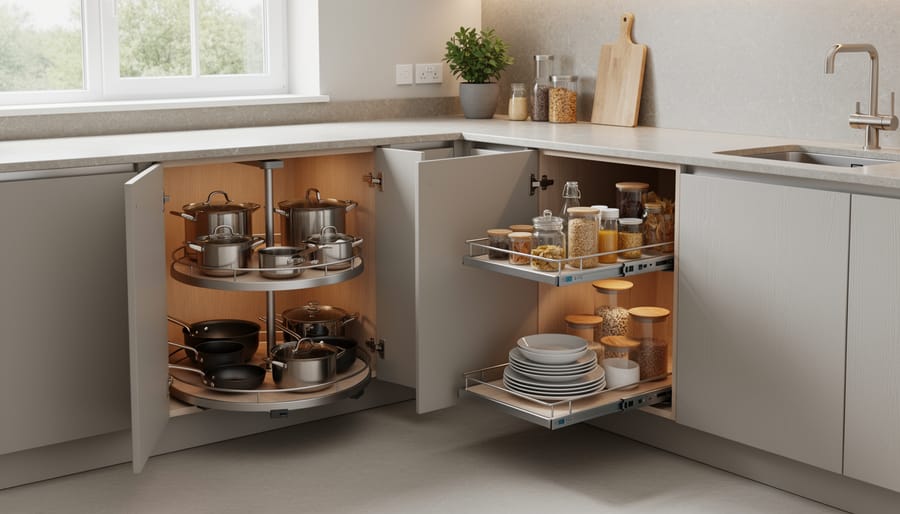
In an L-shaped plan, the corner cabinet is where storage goes to disappear. Standard shelves leave the back third of the cabinet unreachable, so pots and small appliances migrate to the rear and stay there. The fix is a mechanism that brings the contents to you, and the right choice depends on three things: budget, capacity, and how much installation you can tolerate.
Lazy Susans are the simplest option. A rotating tray, either full-circle or kidney-shaped, fits a standard corner base cabinet and costs relatively little. Capacity is moderate, and because it suits cabinets with a bi-fold door, it can often be retrofitted without replacing the carcass. Swing-out trays are a step up. Each shelf pivots into the room on an arm, which gives clearer visibility and more usable volume than a rotating disc, though the hardware is pricier and needs accurate alignment.
Blind-corner pull-outs, often built as two linked baskets that glide out together, deliver the most capacity and the best ergonomics. They also demand the most: precise cabinet dimensions, heavier-duty runners, and usually professional fitting. If you rent or are working within a tight budget, start with a lazy Susan. If you are renovating, a blind-corner pull-out repays the extra effort.
Whichever you pick, favour stainless steel or solid-wood components with replaceable parts over thin plastic, so the mechanism lasts as long as the kitchen does.
5. Choose Multifunctional and Foldaway Surfaces
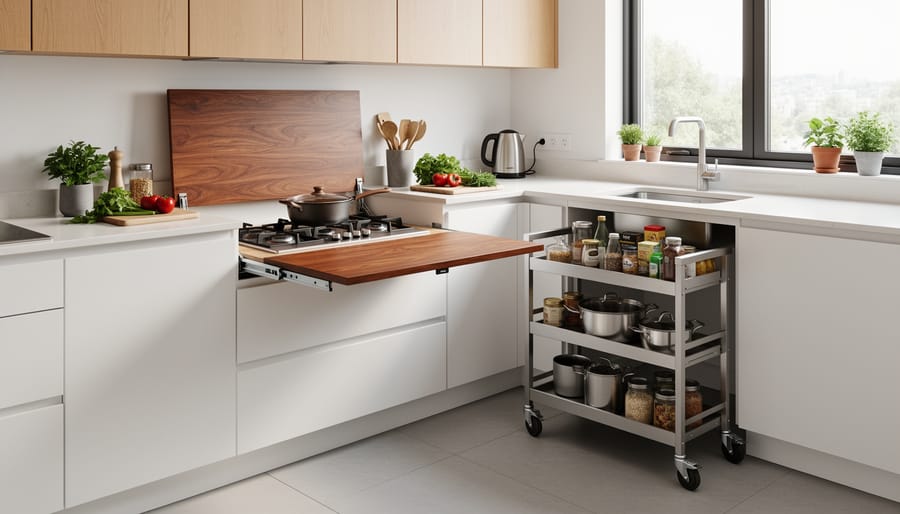
In a compact kitchen, a work surface that only does one job is a luxury. The micro-apartments of Hong Kong, Barcelona, and New York have long treated counters as transformable elements, appearing when needed and disappearing when not.
Start with a drop-leaf table or wall-mounted fold-down counter. Folded, it projects only a few centimetres into circulation space. Open, it gives a prep or dining surface for two. A pull-out prep board, mounted just below the main worktop, delivers a clean, knee-height-friendly surface without consuming permanent counter area. An over-sink cutting board is similarly effective, turning the wet zone into a prep zone and keeping the drainer within reach.
A rolling island on locking casters can shift between prep station, serving trolley, and storage unit, particularly if it incorporates a shelf or drawer beneath. Place it so it never blocks the path between sink, cooker, and refrigerator, and park it against a wall when idle.
Material choice decides whether these pieces last. Hinges and brackets take repeated load, so favour solid hardwood, butcher-block, stainless steel, or FSC-certified timber with heavy-duty hardware over thin laminated flat-pack, which tends to sag and delaminate at the joints. Surfaces that can be sanded, oiled, or re-hinged will serve a kitchen for decades, which is the more sustainable path than replacing disposable units every few years.
6. Reclaim the Overlooked: Toe-Kicks, Cabinet Doors, and Above-Fridge Space
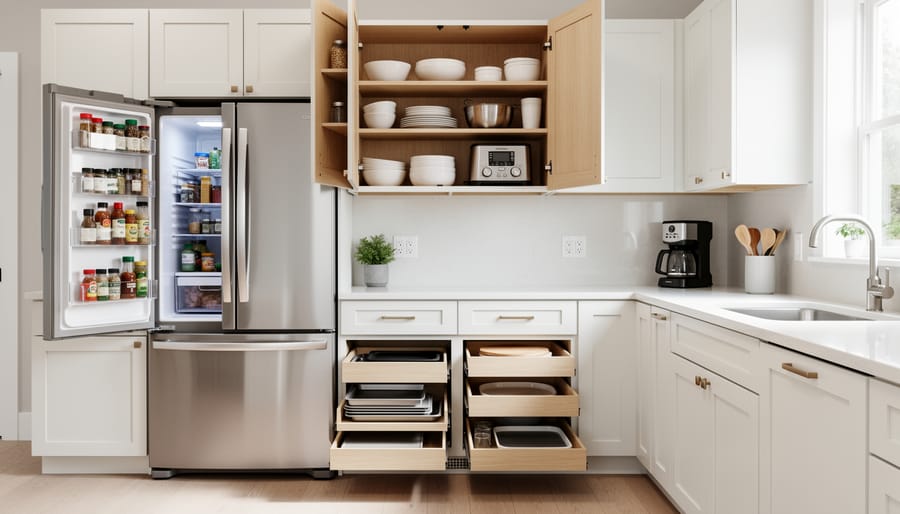
Most small kitchens lose a surprising amount of volume to spaces nobody designed on purpose. Architects approach these voids differently: instead of asking where things should go, they ask what each gap could become. This is space planning at its most practical, and three overlooked zones reward the effort.
The toe-kick, that recessed strip beneath base cabinets, typically hides 10 to 12 cm of dead height. Converting it into a shallow drawer creates a slim, low-profile home for baking sheets, cutting boards, and serving trays. Because these drawers sit at floor level, reserve them for flat items you reach for occasionally.
Cabinet doors are equally underused. A narrow rack mounted inside a door can hold pot lids, spice jars, or foil and wrap rolls, freeing shelf space for bulkier items. Choose steel or solid wood fittings over thin plastic, and confirm the door can bear the added weight without straining its hinges.
Finally, look up. The cavity above the refrigerator is often left empty or filled with an untidy pile. A shallow cabinet fitted flush to the surrounding units turns it into a tidy cupboard for seasonal serveware, bulk goods, or rarely used appliances. Keep a small step stool nearby so the space stays genuinely usable rather than merely decorative.
7. Zone the Kitchen by Task, Not by Item Type
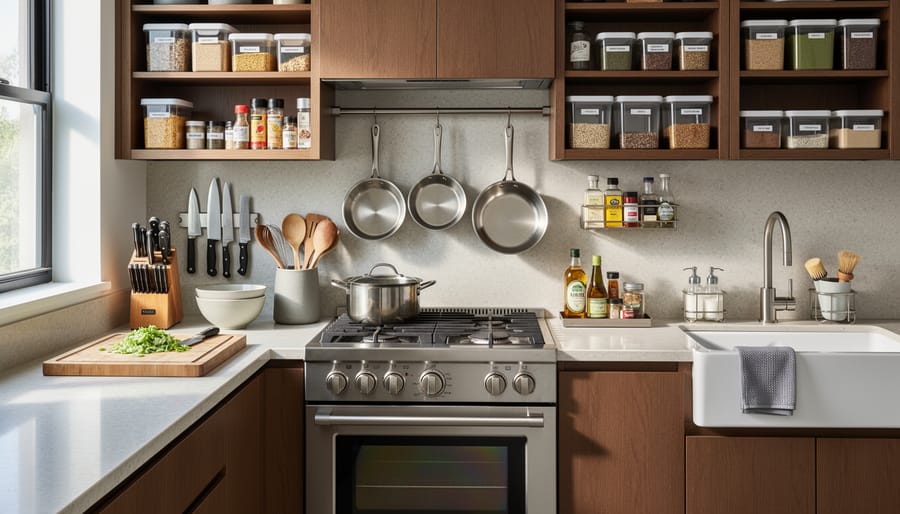
The most common mistake in a small kitchen is grouping things by what they are: all the pots together, all the knives together, all the mugs together. It looks tidy, but it sends you walking across the room to assemble a single meal. Zoning by task flips the logic. Items live where the work happens.
Start with four zones: prep, cook, clean, and store. Cutting boards, knives, and mixing bowls belong beside your main stretch of counter. Pans, oils, salt, and spatulas sit within arm’s reach of the hob. Dish soap, brushes, and drying racks stay at the sink, while pantry goods and lidded containers claim the remaining wall or tall unit. In a compact plan, the classic work triangle between sink, hob, and refrigerator shrinks to a few steps, so each zone should overlap that path rather than fight it.
Zoning works only if you own what fits. Pull everything out, keep what you used in the past month, and ask whether each tool earns its place. One excellent chef’s knife, a heavy cast-iron pan, and a few solid wooden utensils will outlast and outperform a drawer of novelty gadgets. Buying fewer, better, repairable tools is also the most sustainable choice you can make.
Finally, reduce the packaging clutter. Decant staples such as grains, pulses, and flour from bulk bags into reusable glass or ceramic containers stored in the store zone. You cut single-use waste, buy at lower unit cost, and see exactly what remains at a glance.
8. Keep It Calm with Consistent Containers, Light, and Sightlines
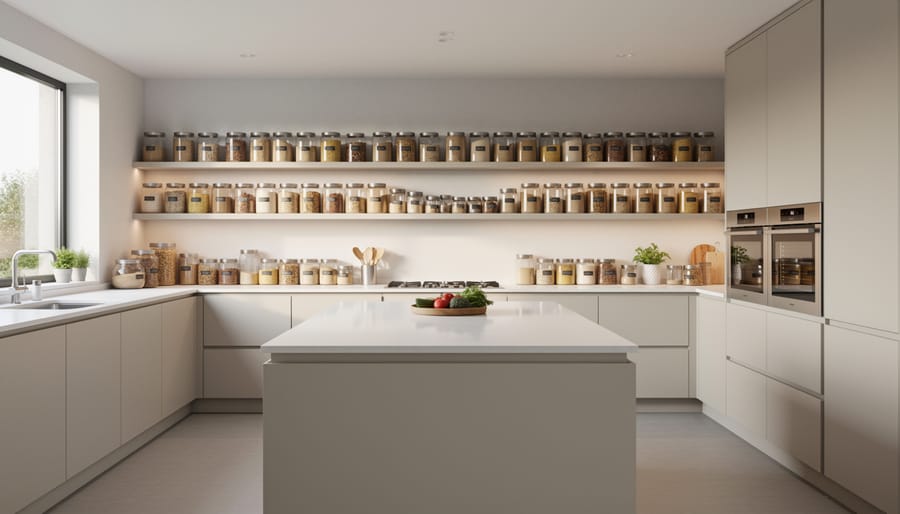
Visual calm is a design decision, not an accident of tidiness. In a small kitchen, every open surface and visible shelf is part of the composition, so restraint pays off quickly.
Start with uniform containers. Matching glass or ceramic canisters for flour, grains, pasta and spices turn a crowded shelf into a single, quiet band of color, and the labels on their sides tell you what’s inside at a glance. The same principle that shapes durable architecture applies here: repetition and a limited material palette create order. Choose two or three tones and stay with them.
Refillable systems also cut waste. Buying staples in bulk and decanting them into reusable jars means fewer plastic bags, fewer half-empty packets and less clutter to hide.
Then there’s light. Integrated under-cabinet LED strips wash the counter with even illumination, remove the shadows that make a compact kitchen feel cramped, and make tasks easier. Pair them with pale, reflective surfaces, such as a glossy backsplash, light worktops or a mirrored panel, and the room reads as larger than its footprint.
To plan the effect, sketch the elevation of each wall and mark where lines of sight land. Before-and-after photographs help too. They show quickly whether the eye now travels smoothly across the room or snags on visual noise.
Small Kitchen Organization: Common Questions Answered
Small kitchens raise the same practical questions again and again, and most of the answers come back to the eight ideas above.
How do I organize a kitchen with no pantry?
Borrow from the vertical and overlooked-space ideas: add a full-height shelf or slim pull-out beside an appliance, then use inside-door racks and above-fridge cabinetry for backstock. Group dry goods in matching refillable containers so a single shelf reads as one calm, organized unit.
What can I do about limited counter space?
Move tools and utensils onto wall rails or magnetic strips, and add a foldaway or over-sink surface that appears only during prep. Whatever remains on the counter should earn its place through daily use.
How do I organize a rental kitchen without drilling?
Choose freestanding and reversible solutions: carousel trays in corners, over-the-door racks, adhesive-free rails that hook over cabinet edges, and a rolling island that doubles as storage. These deliver much of the benefit of built-in systems and leave the walls untouched.
How much storage does a small kitchen realistically need?
Less than most people assume, provided it is zoned by task. Own fewer, better tools, store each where you use it, and measure the need by how you cook rather than by cabinet count.
If budget is the constraint, start where friction is greatest. For many compact kitchens that means a single pull-out or corner solution, since it recovers space you already own without a full renovation.
Small kitchens reward thoughtful decisions far more than sheer storage volume. Each of the eight ideas, from full-height cabinetry to consistent containers, applies the same Efficient Kitchen Organization Ideas logic: treat every void as usable architecture, and choose pieces built to last rather than replace. Begin with the single change that suits your layout best, whether that’s a narrow pull-out beside the fridge or a rail above the hob, and let the rest follow as your space and habits reveal what they need.

Related Posts
Architectural Details That Define a Classic Fireplace

Cash House Buyers Transform Britain’s Derelict Buildings Into Architectural Gems

Why Calgary’s Historic Buildings Need Specialized Architectural Painting

How Delta-8 Retail Spaces Are Redefining Cannabis Store Design

Tips for Designing a Vape-Friendly Building to Enhance Overall Comfort and Safety

Four Architecturally Significant Museums Designed by Renowned Studios

Architectural Marvels in Canadian Cities
How to Design Custom Cabinetry That Complements Your Waterloo Home’s Architecture

Guggenheim Museum Architectural Style: Frank Lloyd Wright’s Spiraling Modernist Masterpiece

The People Who Keep Energy Systems Running in Buildings: Behind the Scenes of Modern Architecture

10 Best Architectural Museums Worldwide, Reviewed

Art Gallery of Ontario Expansion News Update: What Changed and What to Watch in 2026

How Badlands Houses Transform Ontario’s Harshest Terrain Into Architectural Masterpieces

The Badlands of Ontario: Where Raw Landscape Meets Remarkable Architecture